Sunday, July 8, 2012

DIY Hanging {Drum} Light Fixture


{DIY Hanging Drum Light Fixture}


Below is what we had hanging over our table before. It doesn't look so bad in the picture, but I think it's because you can't really tell what it looks like. I was never too happy with the way it looked in the room and always wanted something much lighter and brighter.


I had been on the lookout for a {replacement} option for this light fixture for quite some time, but a lot of my options were just too expensive. Since there was no real need to replace the light, I really didn't want to spend a lot of money on a replacement. Rewind... the hubby didn't want to spend ANY money on a replacement... so we came to a compromise. The other day I stopped into Garden Ridge while I was running errands. I wondered down the lamp isle and one of the lamp shades caught my eye. It's a shade they have carried for a while now, and I had seen it before and always liked it. I just never had a lamp large enough for it to fit. But this time I knew exactly what I could use it for. My new fixture for over our table!! It was just the perfect size too! I was a bit worried it might be too small, but it ended up being just the right size. And it was only $19.00! Now that's a price I can handle!


To be able to hang the shade, we needed a light kit. We found ours at Lowes for maybe around $15.00. This is actually meant to plug into the wall, so we had to modify it a bit. Just cut it off however long you need it to hang from the ceiling. You'll see below that the plug and switch is what we cut off. Then split and connect the wires as if you would a normal hanging light.


What you will need:

- Lamp Shade
- Light conversion kit
- Chain
- Spray Paint (I used a combo of black textured paint and black matte paint)


Step by Step:

1. Take down your old light fixture and keep it close by. You might need to use some of its parts for the new light.

2. Spray paint all your hardware the same color. I also spray painted the cord from the light kit along with the little converter piece too.

3. Once it's all dry, thread your cord through the chain and start piecing together the hardware. 

4. Screw on the shade onto the converter.

*  We actually had to use two pieces of hardware from our old chandelier. It was the top piece and bottom piece that connected the chain. By using these two pieces, there would be no weight put on the actual cord. The weight is now all on the chain instead.


So what do y'all think? It's a fun little change, and only about $40 for the entire thing. Hope y'all enjoyed!!


Wednesday, July 4, 2012

A {Walton} 4th of July

Happy 4th of July everyone! 

Today the hubby and I hosted a fun little {4th of July bash} for our family. There was food and fun had by all - and of course tons of left overs! I'm pretty tired from all of the festivities, so this won't be a long post today, but I wanted to share some photos of the party set up with y'all. Enjoy:)


 Happy 4th!!


Monday, July 2, 2012

Outdoor Lantern Light Fixture


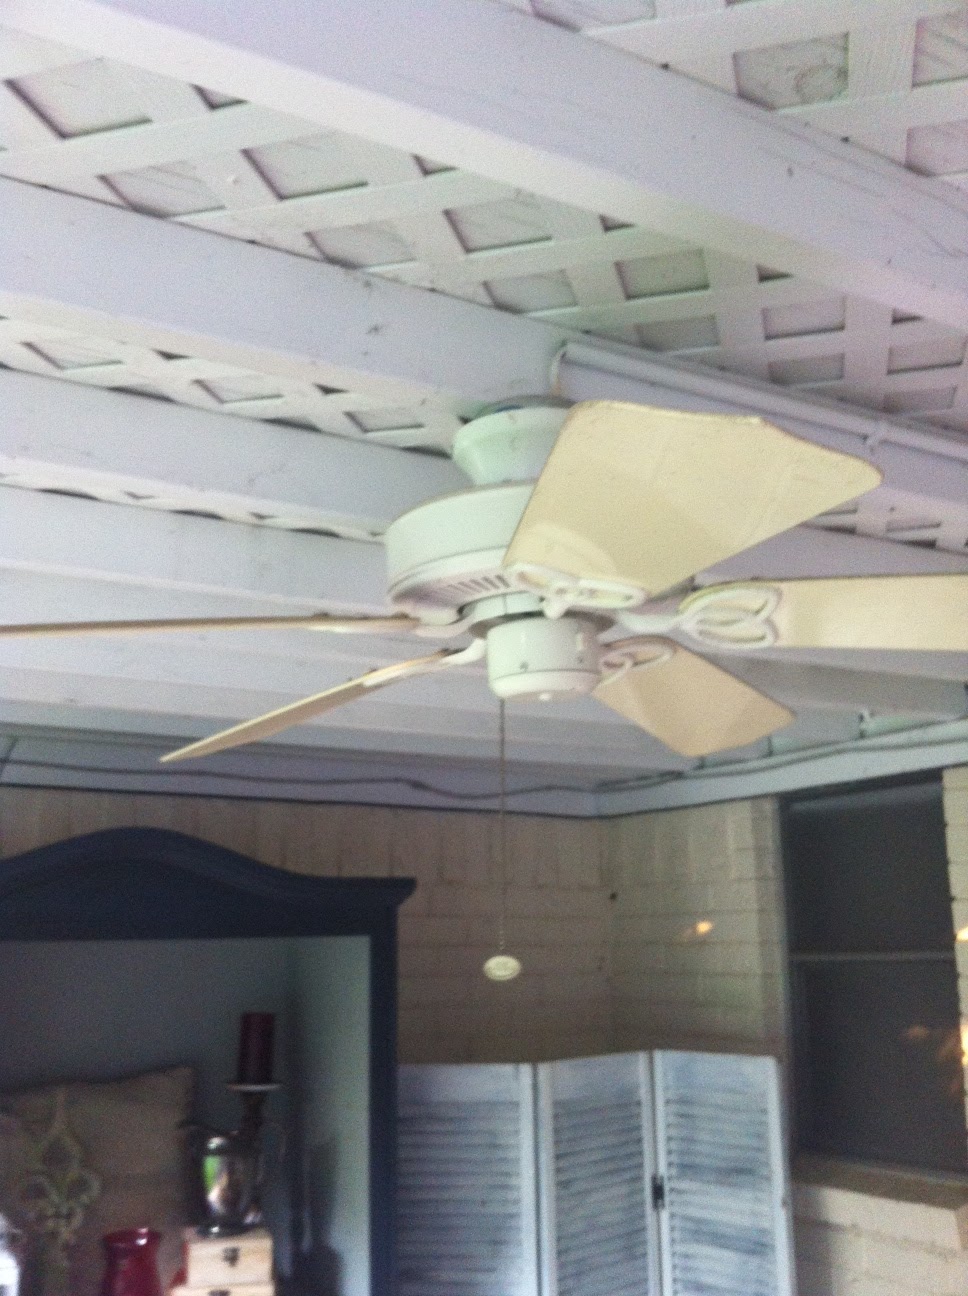
For the past few weeks, I have been working on perfecting our back patio. There have been many {mini} projects going on, and this is the latest. It's our light fixture that hangs over our dining table:) We originally had a fan hanging over the table, but from the moment we moved in last September, I knew that thing had to go. Expecially once we added the dining table! It needed something to make the look complete, but it took me a while to figure out just what that was. I debated whether I wanted a candleabra, or an actual light. The light would attract bugs and be a lot harder to hang... And the candleabra I had my eye on was $70, so that wasn't going to work either. So on to plan C! 


Thankfully, one fine day I impulsively decided to accompany the hubs to a Lowes trip for a tool he needed for the pool. As I typically do, I got distracted in the wonderful world of Lowes and eventually ended up on the outdoor decor isle. That's when I saw it. The beauty that I had been looking for all along! She was just there, waiting for me to grab her off of the shelf! And what is that yellow tag I see? Could it be?? Clearance?? YESSS! Score for Amy!! I ran over, grabbed it, and knew exactly where it was going to go. It was totally meant to be:) And for only $24?? I couldn't even get it that cheap at Marshalls! And we all know how much I love Marshalls! I also hadn't seen a red one like this. Seriously people... this thing was meant for me:)

Now that we knew what fixture we were using, we walked on over to the rope/chain isle to see how we were going to hang this sucker. I knew I wanted to use some old textured rope, but was worried Lowes wouldn't carry anything like that. Well, to my surprise, they DID! I was shocked and so excited! A few weeks ago I saw an antique pulley at a local antique mall and fell in love. It included the beautiful rustic rope and the pulley along with it. It was pretty big though and also pretty pricey. I knew I couldn't use that specific one anywhere in our house, but kept the thought of it in the back of my mind. I really must have lucked out at Lowes that day because about 5 feet to the right of the rope was an entire wall of pullies and accessories. yayyy!!! They were all galvanized metal, so I knew I would have to paint them, but eh - no biggie. We grabbed the supplies we {thought} we needed and headed out. We actually ended up using less supplies than we thought, so that was nice. Too bad I spray painted them before we figured that out!

Here is my little tutorial:

What you will need:

- Hanging lantern of some sort
(make sure it's not too heavy depending on what you're hanging it from. We even considered breaking the glass out of ours, but didn't end up needing to.)
- Rope
- Pulley
- Hook to hang the rope from
- Textured brown or black spray paint (I used black)

Step by Step:

1. Find lantern (carefully break glass out of the lantern if it is too heavy. If the support beam can handle the full weight, don't worry about breaking out the glass. In some lanterns, the glass might not even be the heavy part, the metal/wood might be heavier - just depends on the lantern)

2. Spray paint your pulley and hook whatever color you would like, and wait for them to dry.

3. Test how low you want your lantern to hang. We have low{ish} ceilings on our back porch and I wanted the rope to show more than just a few inches. We actually had to cut off some of the handle of the lantern in order for more rope to hang. Does that kinda make sense? We wanted less handle to show, and more rope.

4. Take down whatever pre-existing light fixture may already be hanging there. In our case, we had a fan. We turned off the breaker (since our outdoor fans were live wires) and safely took down the fan. We capped off the existing live wire and tucked it safely away in an electrical box between the rafters on our ceiling.

5. Screw in the hook where you would like the new fixture to hang from. Make sure to screw it in all the way so there is no chance of it coming out.

6. Thread the rope through the pulley and hang the pulley from the hook. Then find your desired height of the rope/lantern, and knot the rope at the handle. If you are unhappy with the height of everything - no problem! Just untie the rope and try again. I just tied one knot because the weight of the lantern will hold the knot tightly in place. The rope is very textured and won't slip.

7. Sit back and enjoy:)


 Here are some of the process pictures!


 And here is the final product!


{And once more...}

Before:


After:


So what do y'all think?? Fun right! Much better than that old yucky fan! We also had a little helper throughout the project:) Little Bailey hates being left out, so she of course had to be involved... or at least she tried. Really not sure how she jams herself between those shutters, but she sure finds a way! Love that little girl:) Hope everyone had a great weekend - Happy early 4th of July! Look out for my {4th of July party} post later on in the week!


Adios!


Leibster Award!!

Hey guys! Sorry I've been a bit M.I.A. this week - it's been a busy one! I've been working/finishing about 6 or 7 different projects around the house and haven't exactly had time to post about them just yet. BUT in the mean time, I received two great nominations for the Leibster Award from some new friends - Angela over at Number fifty-three and Jeannine from The Concrete Cottage. Thanks guys!! Y'all are wonderful:):)

Now, everyone seems to approach this award a little differently, so below is a general breakdown of what it is.


Award Description:

The Liebster Blog Award is given to upcoming bloggers who have less than 200 followers. The Meaning; Liebster is German and means sweetest, kindest, nicest, dearest, beloved, lovely, kind, pleasant, valued, cute, endearing and welcome.

Here are the rules for receiving this award:

1. Each nominee must post 11 things about themselves
(I'm only asking for 5 things, so pick your top 5 questions from below and answer them how you like!)
2. Choose 5 people to award the Liebster and link them in your post.
3. Go to their page and tell them.
4. Remember, no tag backs! ;);)


  1. What is your favorite movie? Favorite line?
    • Oh man, this one is way too hard!! I would have to say a few good ones are The ProposalZoolander?? I know those are super random, but they are what come to mind right now haha. And my favorite quote is for sure from Zoolander... "What is this? A center for ants? How can we be expected to teach children to learn how to read... if they can't even fit inside the building?" ahahah still cracks me up! 
    2.  What has been your most romantic moment?
    • When my hubby proposed to me and surprised me with my dream ring:)
    3.  Who has influenced you the most?
    • I would probably say my big sister. I pretty much copied everything she did since I can remember haha 
    4.  What part of your morning routine do you consider essential?
    • Breakfast!!! Seriously my favorite meal of the day!
    5.  What is the biggest change you have made in your life in the last year?
    • I would say there are 3 big changes... 1. moving into our first home:) 2. starting my blog:) 3. Adopting our adorable kitten, Bailey 
    6.  What is your favorite quote? Why?
    • Ohh man... Can I pass on this one? There are too many!
    7.  What is the best compliment you have ever received?
    • When I was in high school, my dad and I were on a walk around our neighborhood and we were having a deep conversation about life and growing up and being a good and strong person etc. And then he told me that he wasn't worried the least bit about who I would grow up to be, because I had always had a good head on my shoulders:) I always remember that when times get rough, because as long as you try and stay level headed and do what you believe is right, thats all a person can ask for:) 
    8.  When have you embarrassed yourself in public?
    • haha um all the time! I'm a huge cluts so it happens just about weekly. 
    9.  Who is your favorite author?
    • um yeah... not really a book person. I'm the kind of gal who waits for the movie version to come out;) 
   10.  When you were a child, what did you wanna be when you grew up?
    • A country singer!!! There are multiple pictures of me in cowgirl attire with a microphone jaming out to 90's country. Mainly to Achy Breaky Heart;) Thanks Billy Rae Cyrus!
   11.  What was the last movie you saw in the theater? Was it good?
    • Seeking a friend for the end of the world...Totally thought it was going to be a comedy and it wasn't. I left the theater depressed and kind of scared... I like happy and funny movies with happy endings! This was not one of those! Lameeeee!  

Ok now down to the fun stuff! Time to nominate some of my favorite new{ish} blogs:) I'm going to break the rules a bit and only choose 3 favorites. Makes it more special that way;)


1. A Bit O Whimsy

2. Peace of Home

3. Brittany Makes


Ok peeps! Now time for you three to join in on the fun:) Just pick 5 of your favorite questions from above to answer, and nominate your favorite 3-5 newbie blogs. Enjoy!


___________________________


Ok, now like I was sayin' earlier, I've been working on many projects and have SO many fun things to post about! My next post will be about our new light fixture over our outdoor dining area. It's super fun and not the typical light you might use over a dining table, but I love it and hope y'all will too. It's a little bit of store bought mixed with DIY and very easy to do, so it should be a good post. I'll also be hosting a little 4th of July gathering at my house on Wednesday and will post about the party decor later on in the week;) Get excited!!!