Showing posts with label before and after. Show all posts

Sunday, April 28, 2013

Home Office Reveal

So I'm a few months behind, because I think I might have promised this post a long time ago, but it's finally here!! My home office is finally revealed:)

Since my husband and I both work from home, right across from each other actually, we needed a very large desk. It actually worked out perfectly because we were able to use our massive dining table (from our old house) as our desk. I couldn't imagine getting rid our our old table and was so happy when I realized it would work perfectly as a desk. It's much deeper than most desks, which allows for both of us to have leg room without bumping into each other. Also lots of room for both of our computers as well. And now on to the fun part - pictures!

 photo home_tour19_zpse64b281b.jpg

 photo home_tour20_zpsdb401fef.jpg

 photo home_tour21_zps22bbaa27.jpg

 photo home_tour22_zps99266f7c.jpg

 photo home_tour23_zps4de817f7.jpg

 photo home_tour24_zpse2fe64c6.jpg

 photo home_tour25_zpsb2fb6cc0.jpg

 photo home_tour26_zps40bee458.jpg

 photo home_tour27_zpsa351e3db.jpg

 photo home_tour28_zps1d0c6297.jpg

This Thursday, May 2nd, Aimee from {It's Overflowing} will be featuring my home in her Dreamy Dwelling home series! Make sure to check it out and follow her blog if you don't already. She is a fellow Texan and her blog is SO awesome! Hope you all enjoyed my office reveal!


Follow on Bloglovin


Who I'm linking up with:

Monday, April 22, 2013

DIY Fabric Inserts for Shelving


 photo ShelvingMontage_zps84130fb6.jpg

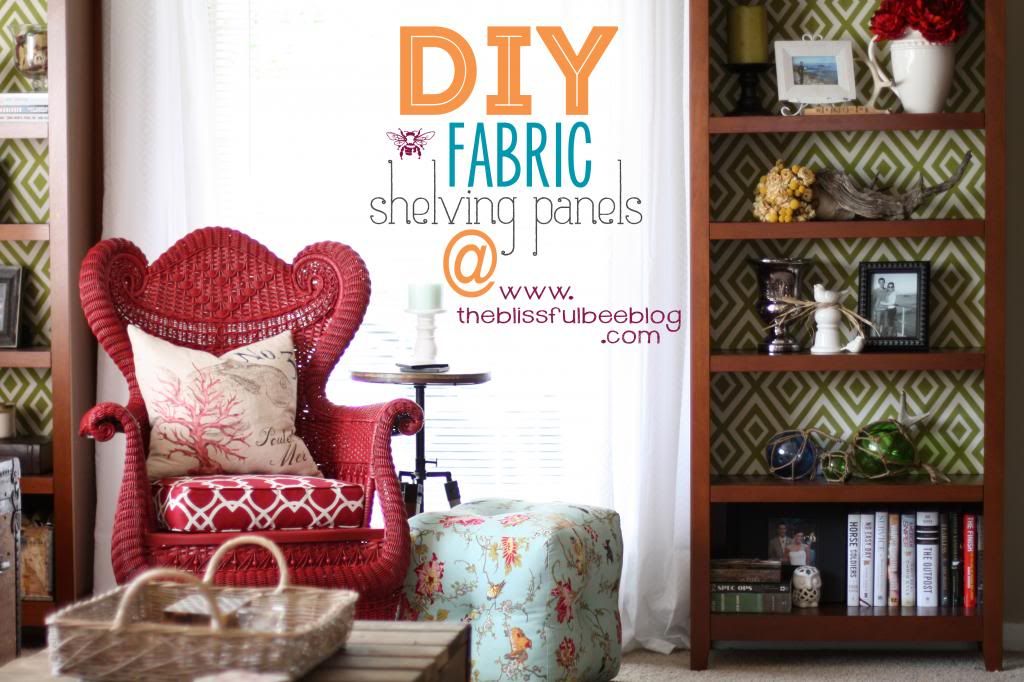
So the other day I had this sudden urge to get out of the house and find me a project to create! I hadn't had one in a while and I was just itching to create something really amazing. For a while, I had been eyeing those custom wallpapered bookshelves that you see everywhere, but just never got around to figuring out how to construct one on a budget with the bookshelves I already had. The idea kind of just fell into the background and didn't resurface until last week.

The shelves I have are from Target and aren't what you call... the highest of quality. They are the kind of shelving that you put together yourself, and the backing is not the prettiest. It's that terrible cardboard that is covered in a fake wood veneer. Not noticeable in general, but it bothered me like crazy just knowing it was there. Thankfully I was able to come up with a high end look for literally JUST $40!!! Since I already had the shelves, all I had to buy was the fabric and cardboard. Ain't too shabby if you ask me;)


 photo before_after_zps12e4aa92.jpg


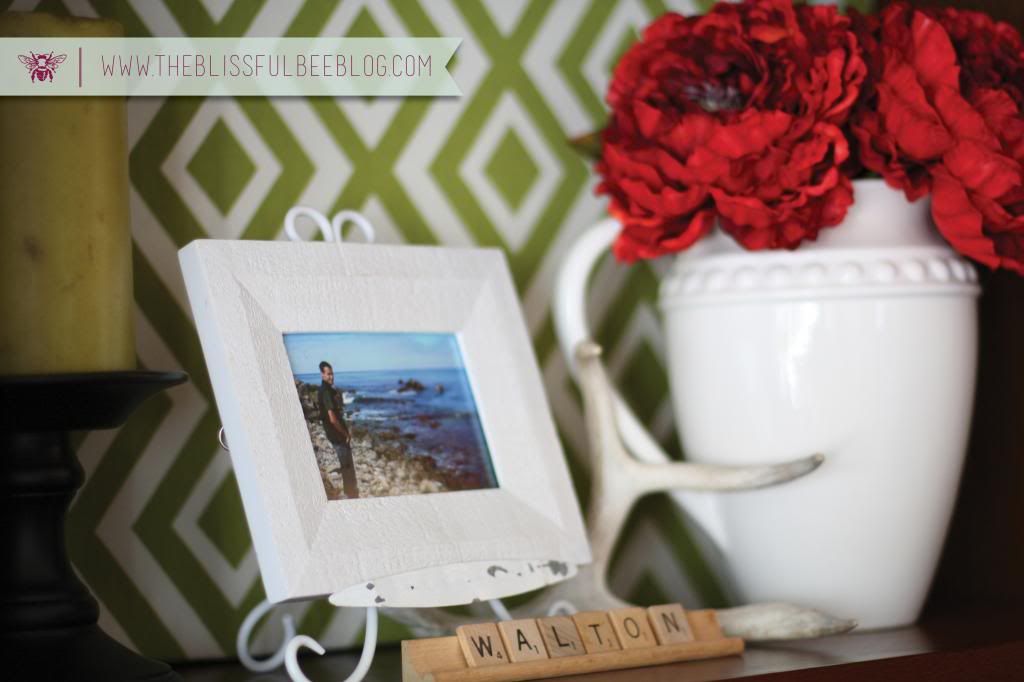
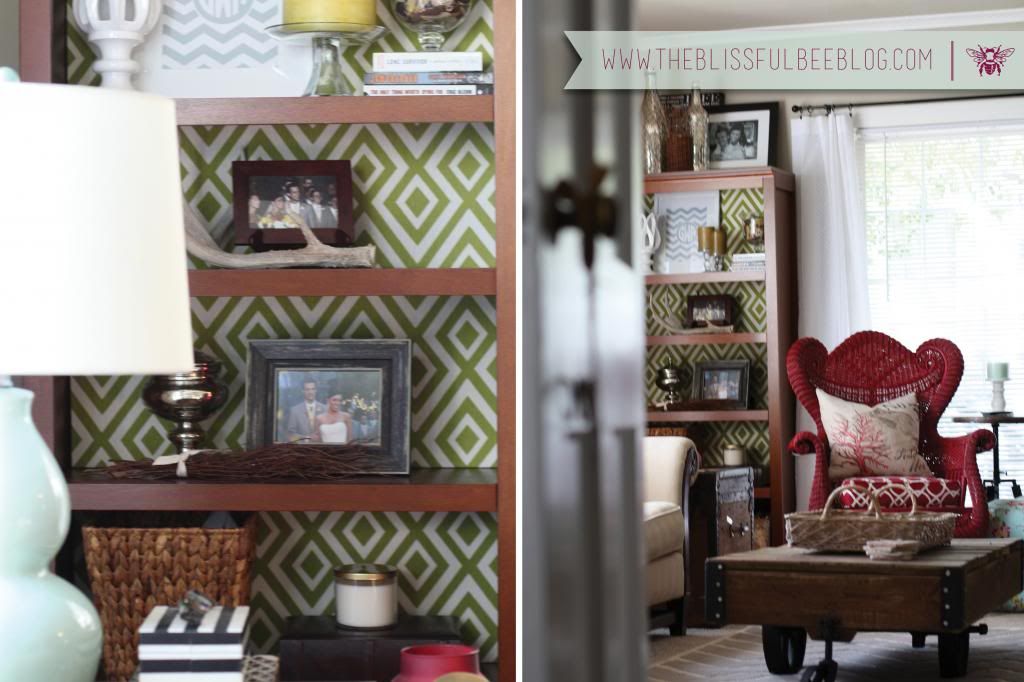
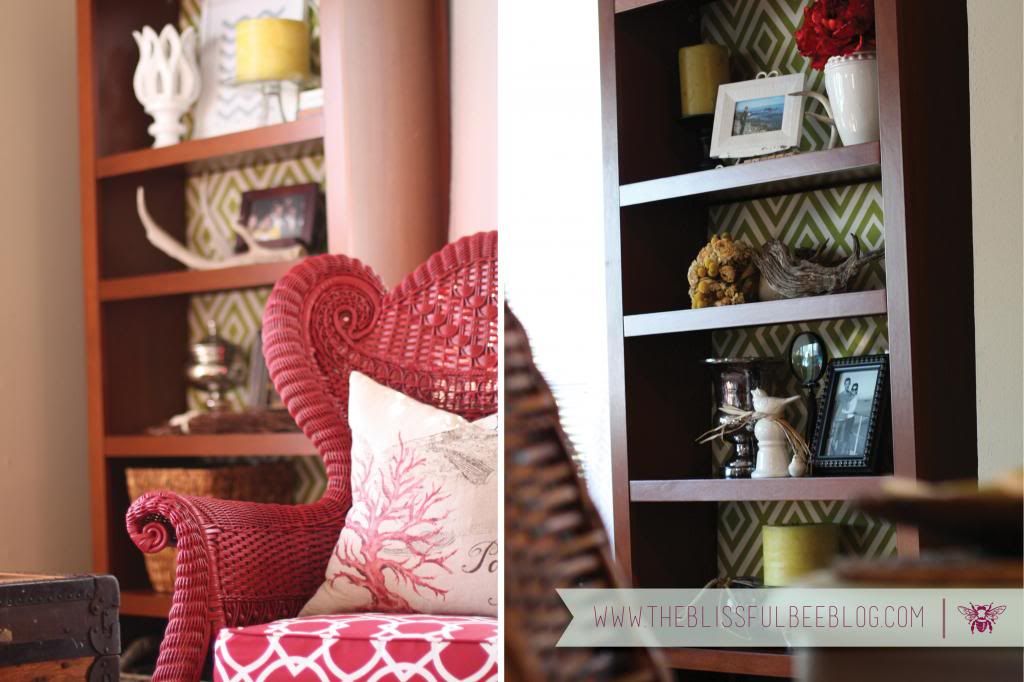
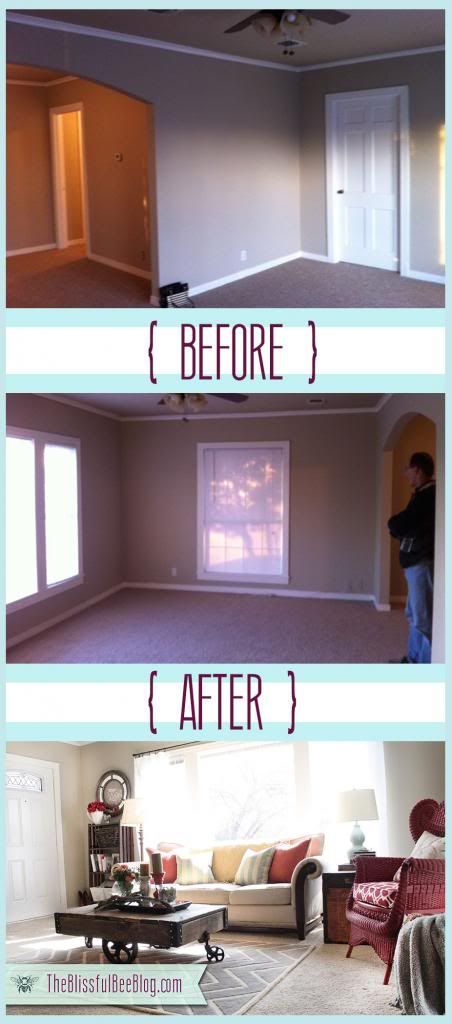
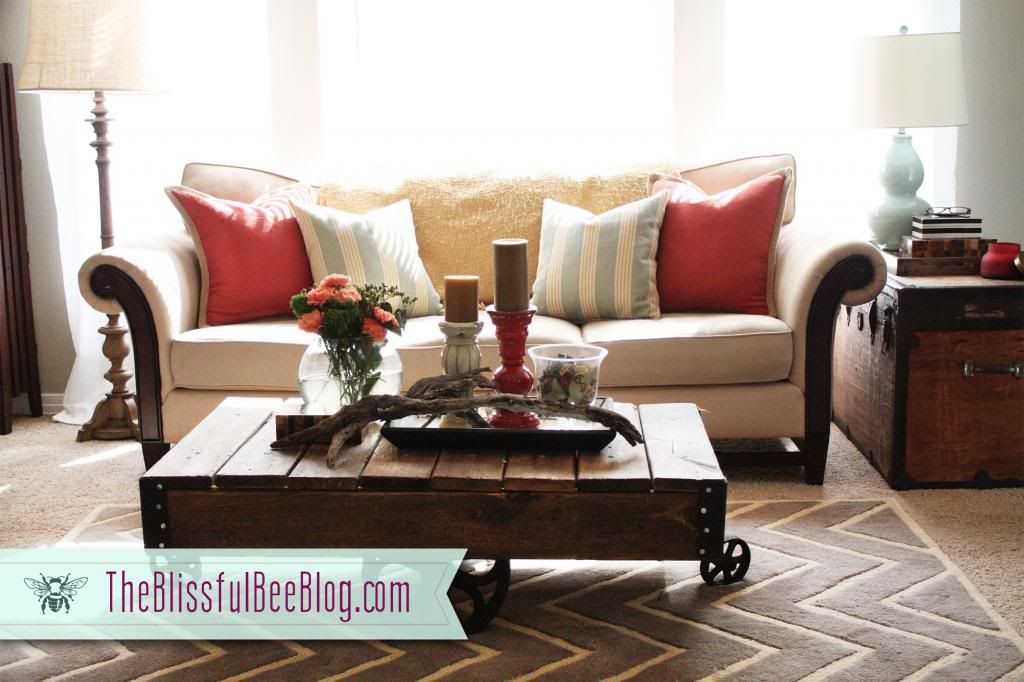
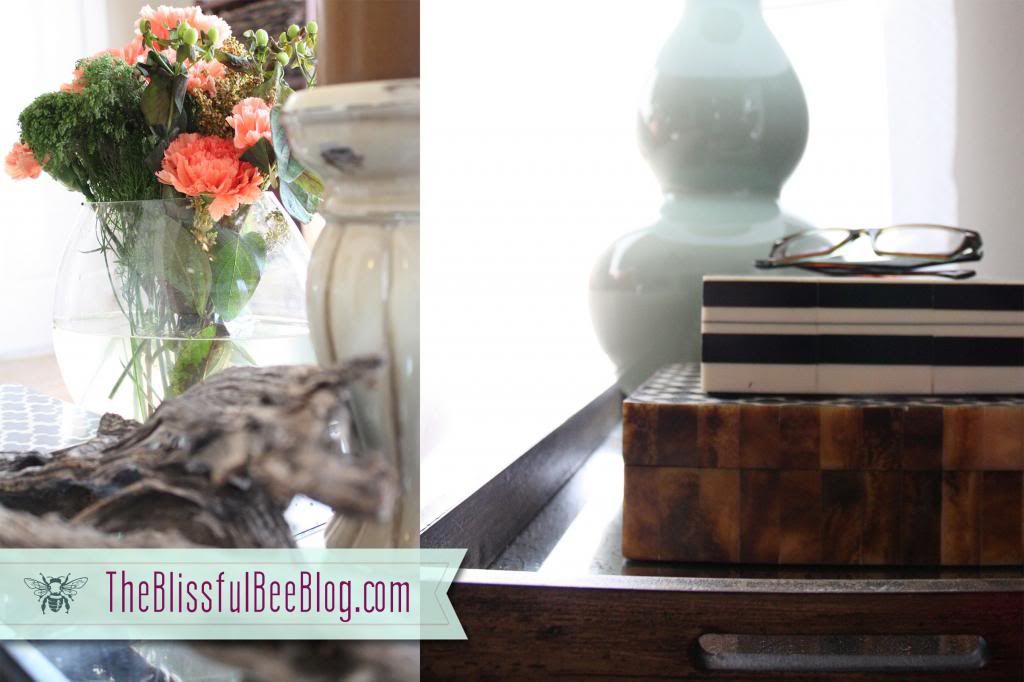
As you can see, above you will find the before and after. I really wanted something that made a statement and was bright and graphic. My goal was to decrease the decor (aka clutter - says my husband) and give the bookshelves a more cohesive design. Focusing less on the decoration on each shelf, and more on the overall look of the design. Below is my tutorial on creating these wonderful fabric inserts for yourself!

 photo HowTo_Shelving_zpscfc30cd8.jpg


Supplies:
1. Book Shelves from Target (on sale) - $80 or $160 for both
2. Cardboard $10
3. Fabric - about 6 yards (on clearance HALF off $9.99) - Total of $30
4. Scissors and/or exacto knife
5. Glue gun and hot glue


Step by Step:
1. Collect all of your supplies.
2. Measure each shelf's height and width. Draw out those measurements onto your cardboard and cut.
3. Pop in your insert into the appropriate shelf to make sure it fits correctly. Adjust if needed. My inserts fit tightly into the back of the bookshelf so they will stay in place. I might velcro them to the back later on down the road, but for now, they stay in place just fine.
4. Take out your insert and place over fabric. Cut fabric about 2 inches extra on each side of the cardboard so you have room to wrap around the cardboard. Once your fabric is cut, flip over the cardboard, tightly wrap the fabric around and begin gluing the fabric to the cardboard. Make sure to keep the fabric tight during the gluing process so there won't be any wrinkles on the front of the panel. Once you are done gluing, flip the panel back around and insert into the book shelf. 

As you can see, this project is VERY easy and extremely affordable to create. At only $40, it ended up becoming one of my favorite DIY projects over these past few months. Such a big bang for your buck!


 photo ShelvingMontage2_zpscf22f57d.jpg

 photo ShelvingMontage3_zps181b7d28.jpg

 photo ShelvingMontage4_zps2e439542.jpg

 photo ShelvingMontage5_zps6729616e.jpg

 photo ShelvingMontage6_zps86f5e0ea.jpg

 photo ShelvingMontage7_zpsa7f8a2b7.jpg


And just a quick reminder that Google Friend Connect will be GOING AWAY on July 1st, so please please please follow along with Bloglovin. It is SUCH a great blog reader, and I even like it better than GFC! Who knew?? Anyways, you can follow along from the link below, or see my sidebar to click on the button. It took me 2 seconds to sign up for FREE and it literally transferred ALL of my blogs over in about 30 seconds. Can't get much better than that, right??

Follow on Bloglovin


Wednesday, March 13, 2013

Front Porch Reveal

I am so excited to finally share my recent front porch makeover with you all! I have always dreamed of having a cozy little front porch, and the time has finally come. Since we are currently renting our house, I am unable to fix up the home exterior like I might with my own. So that means I needed to make the front porch really pop!

If you have a front porch, it is the first impression when people walk up to your home. Don't you want to make it just as inviting as the inside of your home? I know I do! And besides, its a great excuse to design an extra room;) Especially as Spring approaches - its such a peaceful space to sit outside and enjoy a beautiful sunset. And maybe a glass of wine too!

And now for the fun part... Eye candy!


 photo PorchMontage_zps7bb7cb79.jpg
 photo PorchMontage2_zps5dab26df.jpg
 photo PorchMontage3_zps7ebddf91.jpg
 photo PorchMontage4_zpsc7f29733.jpg
 photo PorchMontage5_zps0cab314b.jpg
 photo PorchMontage6_zps28d52d47.jpg
 photo PorchMontage7_zpsd4ace502.jpg
 photo PorchMontage8_zps84c7297c.jpg
 photo PorchMontage9_zpsdf93fbc6.jpg
 photo PorchMontage10_zpsbdecb52c.jpg
 photo PorchMontage11_zps57894af3.jpg


So what do you all think?? It sure makes me smile, so I guess that's what really matters! To find a list of where I found my items, click {here}

I've also been considering starting up a weekly linky party, so please leave comments HERE if you think would link up!


Who I'm linking up with:

Tuesday, March 5, 2013

Living Room - Where I Found my Items

As promised, I have finally made it back to the home decor realm of my blog!! Sorry for my a-d-d adventures in photography and graphic design lately... it is my 9-5 job though, so I'm ok with getting distracted every now and then;)

Today I want to share with you where I found some of my items from my most recent living room reveal. Some of the pieces are vintage, so I've left a lot of those out. But I have done my best for tagging the items that you might actually be able to find online or in the store. Enjoy!


 photo Items_LivingRoom_zps0e191e28.jpg
 photo Items_LivingRoom2_zps80134d7d.jpg
 photo Items_LivingRoom3_zps88ae2202.jpg
 photo Items_LivingRoom4_zps5d659ae1.jpg

On top of the items I have listed, most of the accessories are from places like Home Goods, Marshalls, Ross, etc. The bargain stores of course! I will occasionally venture into Pottery Barn every now and then, but as I preach often, 99% of the time you can find a near identical match in Home Goods or Marshalls. Maybe not always on the big furniture pieces, but the accessories for sure! You just gotta be ready to dig for the good stuff!

Tonight I wanted to sign off with something a little different - a montage of Graham and I's wedding 3 whole years ago! That's right - Tomorrow, March 6th, is our 3 year wedding anniversary:) And 5 years together! It's been a great journey so far and I cannot wait to see what is in store for the two of us.

 photo weddingmontage_zps5889ba39.jpg
 photo weddingmontage2_zpsf2217663.jpg

Hope everyone is having a wonderful week so far:)


Who I'm linking up with:


Tuesday, February 19, 2013

Living Room Reveal

So the day has come! My first room reveal in the new house:) As I have stated since the move, our new home is MUCH smaller - I think 990 sq. ft. to be exact. I was a bit nervous to sign the lease at first because of the drastic difference, but SO thankful we took the leap in the end! It also presented me with the challenge of learning how to design in a small space. And who doesn't love a new challenge?? I know I sure do:) 


 photo before_after_zps7214f148.jpg


The living room looked especially small, which was my biggest concern.  When we walked in for the first time, it looked like one teeny tiny little box. Thankfully I kept reminding myself that rooms always look smaller without furniture - strange concept I know, but it's very true. 

Here is the box I'm talking about...


Could that really be the same room as this.... ???


Woah! What a difference! It's pretty amazing how some thoughtful furniture placement can really make a difference. This living room is less than half the size of our previous home, but you really don't feel like it when your in the space. We also have the same amount of seating as well (minus one chair that really wasn't used). You can't tell from these photos, but our living room opens up to the dining room and office. I think that's also why the space looks much bigger than it actually is. The room is also taken over by these massive windows which let some amazing natural light into the space.  As you can tell... it made it quite difficult to take photos with all of that light coming in! That's what I get for having a six year old camera!

Anyways - I hope you enjoy my new living room as much as I do. And now for some eye candy!


 photo livingroom2_zps927718f2.jpg


 photo livingroom10_zps7eb655ee.jpg


 photo livingroom6_zpsb2653655.jpg


 photo livingroom9_zpsbdf62886.jpg


 photo livingroom3_zps20078595.jpg


 photo livingroom8_zpse215f859.jpg


 photo livingroom4_zpsba1ca6b9.jpg


 photo livingroom5_zpsba33a043.jpg


 photo livingroom7_zps00c436a9.jpg


I will try to write up a post of where to find my items in the room. More to come on that later:) Hope everyone is having a great week so far. Happy Tuesday!