
Hello all! Ok so today I'm very excited to post about one of my proudest DIY projects yet. I know I have been posting mainly about room makeovers lately, but that's not all I'm made of peeps! Little did you know, I have a strong passion for building furniture or up-cycling thrift store {and/or garage sale} finds. I think it all came from my love for turning something old and dingy into something new and beautiful. Oh... and that whole [I'm not a millionaire] thing! C'mon, we all work on a budget, right?? Anyways - I would say about 80% of my home decor & furniture is built from either antiques, DIY pieces, or thrift store up-cycles. So you might be wondering... what in the world is so special about this post? Well remember this little inspiration photo I posted a while back?

Yes, that's right. The Factory Cart Table from Restoration Hardware. Oh how I love thee. I have been drooling over this dang coffee table ever since it came out. But... I wasn't drooling over the ridiculously expensive price at a little over $1000. Yeah, I'll pass. I've actually seen some of the authentic carts go for around $1600. I can't even fathom that!??! But as much as the price scared me off for a while, I eventually came around and realized that I could totally make this. It took some convincing when I presented the idea to the hubby, but he eventually came around and we became dedicated to the cause! We were literally both constantly looking on eBay, Etsy, antique stores - you name it - for supplies to build this thing without making it look tacky or fake.
So I'm sure by now you are wondering how much this project ended up costing. Well, if I must say so myself, it all added up to around $150!!! Isn't that pretty darn good? Some of the supplies we already had, but most of them we didn't. The $150 price tag included the vintage cast iron wheels as well:)
Warning - This was not an easy (or short) process, so this might be a long { how-to } post. Sorry y'all! Here is what we started with in the beginning:
We found a pair of 12in. diameter { authentic } cast iron wheels at $25 a pop at the Fort Worth Flea Market. AMAZING. Especially considering I had been seeing smaller ones on eBay for over $100 per pair. Score!!

A few days later, I found the exact casters I needed on Etsy for only $40 for the pair. They were about 5in. in diameter and a little over 6in. tall. Exactly what we needed. Yay!

Here is the list of supplies that we used/bought. Some if it might seem odd at first, but you will find out why later.
** Ok pause! I have to interrupt here for a second. The hubs just got home from work and is completely making fun of my descriptions/supply list! And yes... I have to admit, I am describing these supplies as a girl. A self proclaimed girly girl who has no idea what most of the REAL names are. And hey, I might be a girly girl, but I do know how to hold a hammer, ok??! I like to say that I'm the brains behind this project, and the hubby is the hands. (Minus the antiquing, painting, sanding etc. - that was all me my friends!) But needless to say, this was for sure a team effort here! OK, here we go!
List of general supplies:
Textured spray paint
Matte black spray paint
Lumber (I used decking wood. You might want to use your own measurements to fit your space, but I did consistently use 6in. wide planks throughout the project.)
- 8: 6in. wide boards to build the top
- 2: 6in. wide boards for the long sides
- 2: 6in. wide boards for the short sides
- 2: 6in. wide boards as supports underneath (not seen when finished)
Stain of your choice
Sand paper or electric sander (I used both)
4 Corner pieces (I think we used an L bracket of some sort?)
Nails to nail in corner pieces (We used roofing nails)
Bolts (16 of them - 2 per wood panel, and we had 8 panels of wood which made the top of the table)
Nuts
Washers
Clamps - 4 - 2 for each side (to hold the casters in place on the sides)
L Brackets to make the table sturdy
Anything to beat up the wood to make it look old (hammers, chains, etc.)
To make the axle:
(We did not have the authentic axle making supplies that we needed, so we had to get creative. We got all of these supplies in the plumbing department at our local home improvement store.)
** Make sure to measure the width of your wheel opening and make your measurements off of that. Our diameter was a little smaller than an inch, so we had to buy 1/2in. diameter tubing for the axle. We literally had to make 5 Lowes trips to get this right. If the cast iron wheel hadn't been too heavy to lug around, we probably would have just brought it with us. Oh well! Lesson learned.
Axle - 24in. 1/2 dia. tubing (this is smaller because it fits into the 2 T-shaped tubes)
2 T-shaped 3/4in. dia. tubing
2 6in. long, 3/4in. dia. tube
2 round base's 3/4in. dia.
2 1/2in. end caps to finish off the wheels
Not sure the real names of any of the plumbing supplies we used, so here is a picture that might help you when you go to your local home improvement store.

Ok now if that wasn't confusing enough...We're finally going to get down to the good stuff! The tutorial!! Here is a helpful layout of our process:


Whew! Ok so I'm sure your on information overload by now, but calm down my friends, we can do this! Now that you've seen our process, I will attempt to describe it all to you. Wish me luck!
First, we made all of our measurements on how big we wanted the table. Since we already had our wheels, we knew how tall it was going to be, so we went from there. I spray painted all the hardware {including the wheels} and let it all dry outside for about an hour or so.
We then went to Lowes and got the wood cut for us. Much easier that way. We had to make a few tweaks after we laid it all out at the house, but at least the majority of the cutting was finished. We created the basic box first with the outer pieces of wood & tacked in some nails to hold it in place. We then added the supports as seen here:

We used L brackets to keep them sturdy. Then we began bolt in the top boards into the supports. Two bolts per board as seen here:
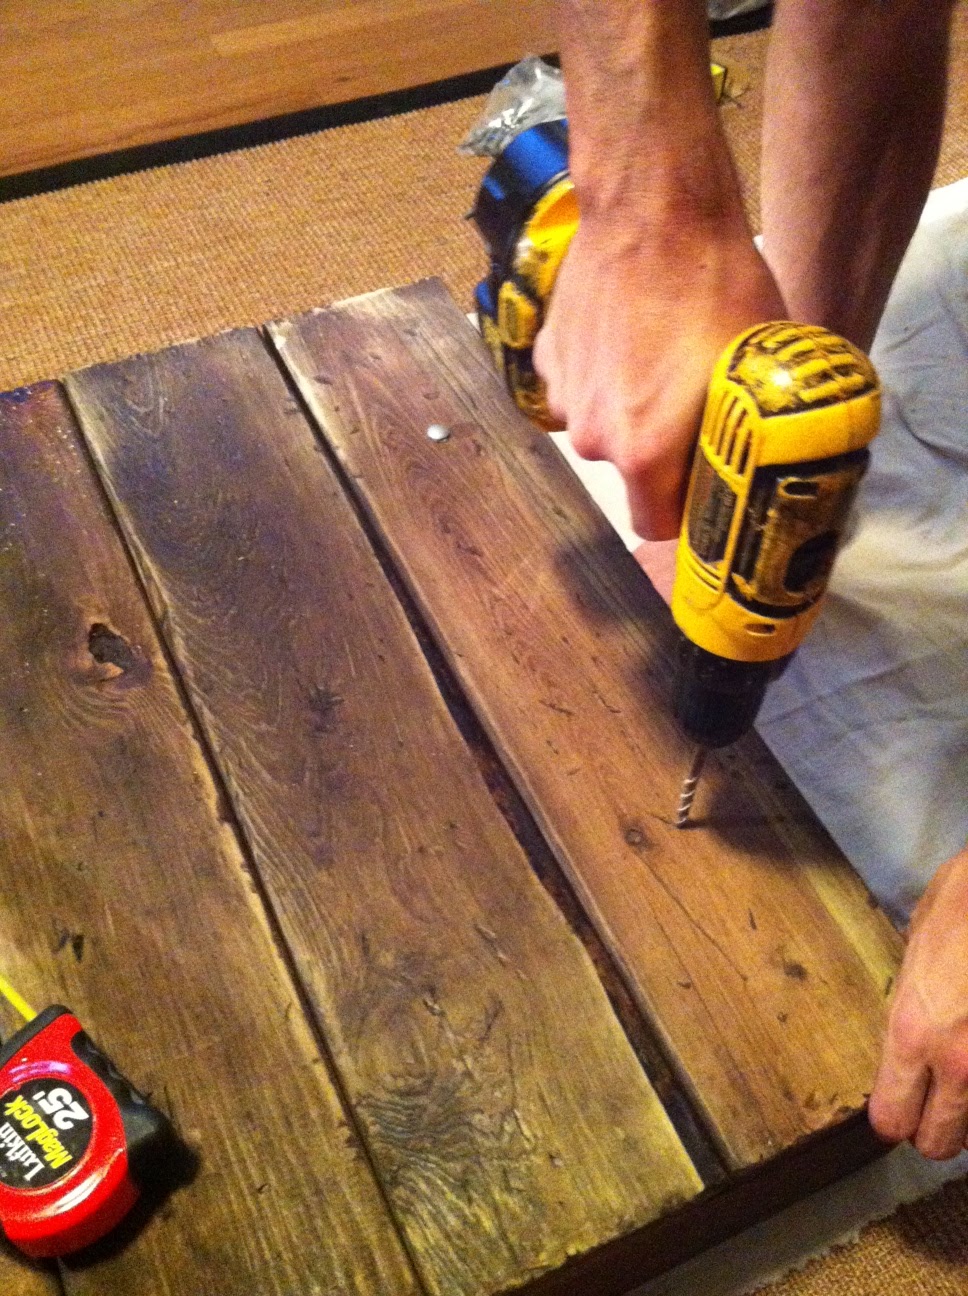
The hubs pre-drilled the holes to make it all fit nice and easy. We then flipped it over and tightened the nuts into the bolts. By this point, the top of the table was very sturdy. Yippee!
The next step was to take care of the wheels and attach our {home-made axle/wheel combo} to the supports. The top was still up side down at this point. We left it that way and attached the DIY axle. This might help you understand:

We then flipped it back over and attached the casters. The casters weren't quite tall enough, so we had to add a little extended piece of wood to really make sure it would stay in place. We used some clamps found in the hardware isle at Lowes. See pictures below to understand what I mean. We bolted these clamps in and tightened them VERY tight.
And finally, we added the corner pieces! We nailed them into the corners with our roofing nails. They were large enough to cover the holes of the L bracket corner pieces, but short enough to not crack the wood. Perfect:)
Whew! Ok I don't know about you, but I'm exhausted! Can we get to the fun part now?? The pictures!!!


For those of you wondering how I aged the wood, I will be posting about that soon {HERE}. But until then, I hope you have enjoyed my recent project as much as I did! I sure am happy we dove into this. It was a bit intimidating at first, but totally worth it!

Amy! What a gorgeous knock off! Beautiful! Make sure you submit this to Knock Off decor blog for a feature. You did an awesome job!
ReplyDeleteThanks so much Roeshel!! I think you just read my mind because I actually just submitted it to Knock Off Decor! Wish me luck!
DeleteThat looks great Amy!!! Ya'll did a great job!
ReplyDeleteThanks so much my friend!
ReplyDeleteHi ~ It sure looks like a RH table, your work is amazing, so awesome.
ReplyDeleteSincerely,
Michele
Pearl 13.1
Wow!!! I'm beyond impressed...it turned out gorgeous.
ReplyDeleteFantastic Job. Your table looks great.
ReplyDeleteAmy, you and your husband have done an outstanding job! It looks just like the Restoration Hardware table. No, I take that back, it looks better! You have also given a fantastic tutorial. You should link up with Miss Mustard Seed on her Furniture Friday linky party. You're a shoe in for a feature (I'm sure you'll be featured soon on Knock Off Decor too).
ReplyDeleteAmy, you and your husband have done an outstanding job! It looks just like the Restoration Hardware table. No, I take that back, it looks better! You have also given a fantastic tutorial. You should link up with Miss Mustard Seed on her Furniture Friday linky party. You're a shoe in for a feature (I'm sure you'll be featured soon on Knock Off Decor too).
ReplyDeleteThanks so much girl! I will totally have to stop on over to Miss Mustard Seed tomorrow and link up. Thanks for keepin me posted:)
DeleteAnd I actually will be featured on Knock Off Decor on Tuesday, May 15th at noon {YAY}, so make sure to head on over there to check it out. Thanks for stopping by!!
Making one of these carts is on my to-do list for when I eventually redo our living room. Thanks for the fantastic tutorial! I featured this on facebook! http://www.facebook.com/pages/Shabby-Love/188998027826178. Feel free to stop by my blog to grab a featured button. :)
ReplyDeleteMelissa
vintagemellie.blogspot.com
This is so beautiful. I am totally jealous!
ReplyDeleteAmy, that is truly amazing. It looks fabulous and you must be so pleased with the outcome. I'd love it in my house for sure!!
ReplyDeleteI'd love it if you'd consider sharing it at Shabbilicious Friday ~ http://shabbyartboutique.blogspot.com.au/2012/05/shabbilicious-friday.html
Thanks so much! And I would love to share it - I'm heading over right now!!
DeleteThanks for sharing on Shabbilicious Friday Amy. Just letting you know I also featured you today on my facebook page - http://www.facebook.com/WoodberryDesigns
DeleteOkay....I am speechless. That is so amazing. I have been wanting one of those from Restoration Hardware....and now....you just made my whole weekend. I am pinning this and shouting it out on Facebook.
ReplyDeleteThank you sooooo much for the inspiration.
blessings,
karianne
Oh wow thank you!!! I appreciate the shout out more than you know:):)
DeleteI just found this on Facebook (via Thistlewood Farm) and had to say WOW< WOW< WOW!!!!!!!!!!!!!!!!!! You 2 did a fabulous job. I am keeping this in my favorites. My hubby and I are building a new home and I WANT ONE OF THESE!!!!!!!!! Thanks so much for the GREAT tutorial. XO, Pinky
ReplyDeleteWhat an amazing table! It looks better than the original in my opinion! :) What a beautiful job and great tutorial. Megan
ReplyDeleteThanks guys! This project was a blast and I really think anyone can do it if they dedicate the time;)
ReplyDeleteThis is AMAZING! I hope to try this out in our new place. I'd love for you to link up at my party. Hope you have a great weekend!
ReplyDeletehttp://lovingthiscrazylife-melissa.blogspot.com/search/label/POC%20LINKY%20PARTY
Thanks for letting me know about your linky party! I'm heading over right now;)
DeleteI am featuring your cart at decor2adore{able} on the 27th.
ReplyDeleteI would love to have you enter my weekly party at Its So Very Cheri--I would definitely feature it there too.
Following along...
Cheri
Oh wow thank you so very much!! I will for sure link up:):) Thanks for letting me know!
DeleteAmy!!!! It came out fantastic!!! It puts my Havertys one to shame ;-) awesome job girlie!!!
ReplyDeletewhoh - LOVE is the only word in my head right now ! Beautiful!
ReplyDeleteHoly moly, Amy! That thing looks like the real deal! You'd have to spend $1,000 or more to buy one! GREAT job on this! Love it! :)
ReplyDeletexoxo laurie
WOWZA! You did an amazing job of finding AND constructing this great table! I'm SO going to follow YOU!
ReplyDelete=Revi
This table is SO awesome! I am featuring it on my blog tonight.
ReplyDeleteOh my goodness, this table is so amazing!! I just pinned it.
ReplyDeleteThank you for giving such a great tutorial on the how-to. I know that takes a lot of time to do. It turned out beautifully and now I want to make one too. Oh my, I think everything I just typed rhymes - oh well, a little poetry never hurt right? :) Have a wonderful weekend!
xo,
Kathleen
Thanks so much!! That really means a lot!
DeleteThis is so awesome! I want to make one so bad:)If you have a sec this weekend, I would love for you to link up at my Get Schooled Saturday link party going on now until Monday night!
ReplyDeletexxx
Kim @ Too Much Time On My Hands
http://too-much-time.com/2012/05/get-schooled-saturday-22-and-burlap-fabric-giveaway.html
Thanks for letting me know about the link party! I just linked up and you found yourself a new follower:)
Deleteummm. only the best diy like in a long long time. i'm just dying for it. want!
ReplyDeletei am your newest follower and hope you're following back!
http://hellolovelyinc.blogspot.com
have a wonderful weekend.
michele
Thanks for stopping by! Just visited your site and it's beautiful - you've got yourself a new follower:)
Deletewow this is amazing i LOVE it. it would be great if you could come and link it up at http://www.twiggstudios.com/2012/05/sunday-show-off-linky-party-and.html
ReplyDeletethankyou xxx
this is wonderful. Just a fabulous knock off. The best I've seen. I'm not sure I thought this was possible - now I will have to look out for some of those wheels, because now I know it can be done! You earned a new follower!
ReplyDeleteThat is just beyond incredible!!! I am seriously in awe of how you executed this and it looks amazing. Well done! :-) Thanks so much for sharing this with us at Inspiration Friday~
ReplyDeleteVanessa
It looks amazing!! I am so impressed, I like yours much better than the inspiration piece! Thanks for sharing and I am a new follower! Hope you have a great weekend!
ReplyDeleteMichelle
www.delicateconstruction.com
Just stopped by your blog and linked up! Such a great site - I'm your newest follower!
DeleteWOW Amy, that is pretty darn impressive. I love it! Thank for sharing your creativity with the newbie party. Enjoy!
ReplyDeleteWell, I know of a second business you and your husband could begin and make the big bucks! This is absolutely beautiful...great job. I stopped by from Debbiedoo's and so happy I did.
ReplyDeleteI'm in the DFW area so it's always neat to hook up with another Texan! Stop by and say hi when you can.
Pat
Amazing! I love the RH cart too, and have even seen a few "real ones"--but they were close to the RH price! Love your version!
ReplyDeleteYou guys did awesome! You should really be proud. BTW - I had to chuckle when you said the hubs was giving you grief over part names. Hey, us hammer banging girly girls know just what you mean! Found you from the Newbie Party and a proud new follower! Looking forward to visting often.
ReplyDeleteWow!! I am so impressed! I've loved that cart too but not the price:) Yours is the best DIY copy I've seen yet. Great job - you should be proud of yourself and your hubby.
ReplyDeleteYou go girl - this is fabulous! I am pinning this and giving you a FB shout out right now!
ReplyDeleteHappy to be following!
Kelly
love your cart, i've always wanted one of these, i would love to feature it, if that would be ok with you please let me know!
ReplyDeleteLAUREN
http://westfurniturerevival.blogspot.com/2012/05/revival-monday-62.html
DeleteI Featured it today, hope you like it!
THANKS AGAIN
LAUREN
Beautiful! You did a fantastic job, it looks every bit as good as your inspiration one! Congrats on a wonderful knock off! I'm visiting from Debbiedo's Newbie Party
ReplyDeleteAmy, Wow! Amazing job on the knock off! I think I like yours better than the original. :-) Found you through Debbiedoo's Newbie Party. I'm now following and can't wait to see more of your fabulous blog!
ReplyDeleteSharla
My jaw dropped, this is awesome! You rock!
ReplyDeleteDebbie
That is awesome!!! I'm following you now. :)
ReplyDeleteYou seriously NAILED THIS!Looks so well made and rustically elegant!
ReplyDeleteGreat GREAT job!!
Visiting from newbie party!
You should absolutely be proud of that cart! And I like yours better than Restoration Hardware!
ReplyDeleteSo I will be pinning because this is just too cool!
:)
Linda
Hey Amy! I couldn't find an email address on your site, so I'm asking you straight out! Can I feature your factory cart on my weekly I Spy a DIY series? You're crazy talented, and this cart is amazing! ~britt
ReplyDeletewww.brittanymakes.com
WOW, you and your husband did an AWESOME job!! Great tutorial as well.
ReplyDeleteTotally awesome project!!!
ReplyDeleteGoodness that is amazing! Your version is so much nicer than the Restoration Hardware version! Great job! :)
ReplyDeleteAnd I've browsed around ... your home is just charming! I'll be following along. And if you feel like sharing, we have a Be Inspired Link Party every Tuesday morning. Can't wait to see more fabulous projects!
ReplyDeleteThanks so much for letting my know!! I just linked up:):)
DeleteGORGEOUS piece. I've loved those carts for ages too, but just would not pay the price. I can't believe you lucked up and found all those perfect wheels. GOOD JOB. Im now following you. Please come visit me at PICKINandPAINTIN.blogspot.com. THANKS. 8-)
ReplyDeleteHere from Knock Off Decor, it looks awesome!!! I think yours is better than your inspiration piece!
ReplyDeleteJust amazing! You and your hubby need to give each other big pats on the back. I'm so jealous!
ReplyDeleteThis is simply gorgeous and very impressive!
ReplyDeleteTake a look at my blog at http://randomthoughtsfromanincoherentmind.blogspot.com.
I'm featuring you this morning as part of Debbiedoo's Newbie Spotlight of the Week! Congratulations!
Just came over from Knock off Design. You did an amazing job. Those wheels are just the right touch to make it perfect.
ReplyDeleteStopping in from http://randomthoughtsfromanincoherentmind.blogspot.com.
ReplyDeleteand had to say how much I liked your RH inspired project! I bet you smile every time you look at it!
This is just so gorgeous...well done! I really love the way you've styled the top of it too...oh and your house looks beautiful :) I'm a new follower, if you have a minute I'd be delighted if you stopped by my blog too.
ReplyDeleteCas x
Hey girl! Just wanted to let you know you were featured at my party today! I can't get enough of this project. It's on my Honey Do list for our next home!
ReplyDeletehttp://lovingthiscrazylife-melissa.blogspot.com/2012/05/welcome-to-katie-from-quality-cheap.html
Hope you're having a great week!
{Hugs}
Awesome!! You did a great job on it!! Sharing at the party tonight~ thanks for linking up at Feathered Nest Friday!
ReplyDeletewow, great job, who woulda thought this could ever be replicated!
ReplyDeleteThis cart is absolutely amazing. I have seen many of these, but yours is hands down the best. I can't believe you were able to find those parts for such great prices!! What an wonderful tutorial too.
ReplyDeletePS I host a linky party with Stuff and Nonsense and the Friday Linky girls. I would love it if you stopped by to share this with my readers at Redoux. Thanks!
Awesome!! Thanks for letting me know - I just linked up!
DeleteWow, this is incredible! Love it and the awesome tutorial.
ReplyDelete~Amy @ Permanent Kisses
What an amazing job you both did, as well as, being an amazing team. No one would guess this was do-it-yourself. The authentic wheels really make it look old. Absolutely incredible job, Amy!
ReplyDeleteAmazing I'm totally in awe. You and your husband did a fantastic job. I love that RH factory cart too. I cant believe you nailed it for 10% of the cost...Sigh.
ReplyDeleteI have been swooning over this piece at RH for a long time too. i think yours is even nicer than theirs!! PLUS you have the satisfaction of knowing you made it yourself. I give you a lot of credit, I am too intimidated to even try, but you did it!! GREAT job!
ReplyDeleteYou know how much I loved this the moment I saw it! Thanks so much for joining the party! I featured you this morning - just had to!!!
ReplyDeleteAn absolutely amazing job! Congrats to you both.
ReplyDeleteI love the cart! I was debating getting one of these at the Country Living Fair last October- they sell there for $375- but the shipping was as much as the table so I took a photo vowing to make one. Definitely looks like a lot of work but worth the effort! Awesome job!
ReplyDeleteDani
This is one of my favorite projects EVER. It is my honor to feature your table tomorrow...♥
ReplyDeleteHi Amy,
ReplyDeleteI'm a new follower! I found you through a comment you left at "The 36th Avenue". So nice to meet you.
The aged wood project caught my eye.
Have a great day, Deb @LakeGirlPaints
LOVE your cart table! Great job! I'm a new follower.
ReplyDeleteWOW... just wow. It looks authentic; no worries there alright. You guys should go into business selling them!
ReplyDeletethat is FABULOUS!!! awesome work! thank you for sharing!
ReplyDeleteThat is beautiful...I can't tell the difference...except in the price! I'm a new follower cause' I have a house to decorate and you have a style I love...Thanks for sharing, Lori
ReplyDeleteSo, YOU are the one who made this flippin' sweet project! Beautiful job, now a follower :)
ReplyDeleteWould love it if you visited and followed back!
Tanya @ http://twelveoeight.blogspot.com/
Hugs :)
This table is just the darling of features this week! And rightfully so! I am featuring it too tomorrow. Goes live at 5:00 EST. Thank you so much for sharing.
ReplyDeletePS, if you haven't sent this into to Design Sponge Online, you really should. They have the best of the best Before and Afters.
Amazing! I love this so much. I am your newest follower!! -Sarah
ReplyDeleteSo happy to be featuring you this week! Thanks so much for sharing with us!
ReplyDeleteI have been wanting a table like this forever! I am so impressed with your work! Awesome job :) i would love for you to come show it off at the linky party on my blog! It goes live every thursday night. http://www.lizmarieblog.com/2012/05/link-up-with-meliz-marie/ Hope to see you there!
ReplyDeleteGreat job Amy....I am visiting from MMS and am also a new follower! Hope you'll stop back and visit me too!
ReplyDeleteIf you haven't joined Debbiedoo's Newbie parties you should! She is having a Magazine Copycat Challenge on the 31st and this would be a great entry!
What an amazing job-looks as authentic as the $1000 version-I'm your newest follower-stop on by for a visit!
ReplyDeleteWhoo Hoo, bravo girl! I am your newest follower, came from MMS after she featured you, way to go, can't wait to see what you come up with next!
ReplyDeleteIt's fantastic. So you know I must pin it to some day make my own!
ReplyDelete~Bliss~
Whoa ... this is amazing !! I absolutely love it. It looks better than the ones I've seen in the catalogs. And, it looks fabulous in your beautiful space, too. Thanks for the inspiration.
ReplyDeleteWAAAY CUTE....you did one fantastic job here, girl. it is beautiful.
ReplyDeleteAmy you knocked this one out of the ball park...seriously! I loved it a few weeks ago and I sure love it now. Thanks again for sharing.
ReplyDeleteWell, let me be #98 to tell you BRAVO for a job well done. Just fabulous. I love it. Thanks for sharing at Wow. This will be featured next week.
ReplyDeleteFélicitations pour ce splendide travail ! Merci pour ce partage. Vi
ReplyDeleteCongratulations ! It's amazing Thanks
ReplyDeleteThat is so fantastic~ you and the hubby did a wonderful job working on this together. Don't you just love it when the pieces all fall into place...on the cheap!
ReplyDeleteI've seen those carts, well, I've seen ONE up close and personal -- and they paid the price you mentioned! Your version is closer to my budget; plus there is the whole DIY factor-- makes you proud!
smile and enjoy--
came over via-- CaCC...
oh my gosh!!! your cart-table is fabulous! LOVE it!
ReplyDeletegreat tute!
thanks for sharing at catch as catch can.
gail
Blissfully beautiful - I just love it !
ReplyDeleteCongrats on all the very well deserved features - absolutely stunning !!
I will be featuring this (as is everyone else) tomorrow! Come and have a look :o)
ReplyDeleteStacey of Embracing Change
That is really great! And good tutorial too. Thanks! Join me for my new link up Wow Us Wednesdays.
ReplyDeleteHoly Cow! I'm in love with this blog. I can't believe I am only just now discovering it. I'm your newest stalker, er, follower. You have mad skills! I would love an industrial cart for a coffee table. Yours is the bomb-diggity!
ReplyDeletexoxo,
Kim
This comment has been removed by the author.
ReplyDeleteI can't say enough...love it! Who doesn't want one of these coffee tables in their own home? Just found you on Wow Us Wednesdays and had to hop on over. I just joined your site. Blessings ~ Judy
ReplyDeleteSimply put... Absolutely AMAZING job!! Excellent!
ReplyDeleteAMAZEBALLS. New reader from Arlington!
ReplyDeleteThis is the best DIY!!! I've been wanting a table like this also.
ReplyDeleteI'm a newbie blogger & would love to know how you made the "picture layout tutorial."
CIndy
Living On The Bliss
Great job! That's really beautiful! For anyone interested in making one but not sure they can do it from scratch, or unable to source the hardware & wheels, you can buy authentic (but rough) factory carts from Second Chance in Baltimore, MD. They run around $250 but you can bargain with them. They have dozens of carts. If you don't live in the mid-Atlantic, Google local reclamation facilities or factory carts.
ReplyDeleteSecond Chance is a DIY'ers paradise! Check it out! Www.secondchanceinc.org
Great score! My husband and I have been in ka-hoots making one. ;) They ARE too expensive.
ReplyDeleteair sanitizer
Wow, what a great job on the coffee table - it's gorgeous! I have this linked to my coffee tables post too today, well done!
ReplyDeleteAmy, That is one amazing DIY! I saw one at a yard sale a couple of months back for $100. It was in pretty rough shape, but I have been kicking myself ever since for not buying it! I could have at least used all of the parts off of it! Live and learn! Love your blog. I am your newest "linky" follower! Life to the full, Melissa @ DaisyMaeBelle.com
ReplyDeleteYou did a fantastic job on this!
ReplyDeleteI just found your tutorial, this is fantastic, I drooled over one of these when we were shopping for our furniture and decided it was way out of my budget. Now if I can talk hubby into trying it, I'll be a very happy camper.
ReplyDeleteI'm not sure how I didn't see this for the past 14 months, but you did an amazing job!! The hubbz and I collect salvaged materials (i.e. barn wood)and create fun pieces. This project is definitely going on the "to-do" list! Your instructions are AMAZING! Perfect for those of us who don't know all the "official" names for the various parts. :)
ReplyDeleteDefinitely pinning this "toot" for future use! Thanks for sharing!
Soon after look at a pair of of the weblog posts on your internet site now, and I actually like your signifies of blogging. I bookmarked it to my bookmark web internet site record and will most likely be examining yet again shortly. Make sure you check out out my internet web site as properly and permit me know what you consider.
ReplyDeleteBathtub reglazing NYC
Bathtub reglazing nj
I truly appreciate this post. I’ve been looking everywhere for this! axlewheel
ReplyDeleteHi, you make mind blowing ideas and a spectacular article hereaxlewheel
ReplyDelete