Showing posts with label Furniture. Show all posts

Wednesday, February 6, 2013

Mirror Makeover

Today I want to share another one of my furniture makeovers for the new house. I forgot to take a before picture, but as you can see below, I took a snap shot mid-project! This mirror has seen a few different paint colors in its day - let me tell you! It all started somewhere in the 80's in a very gaudy gold finish. Now don't get me wrong, I love me some gold, but this was a bit overbearing. This mirror actually sat in my parents formal living room through the 80's and 90's and disappeared sometime after that. Yes, it was time for it to be hidden away in a closet and we should all be thankful for that! 

Ok now fast forward about a decade... Once I graduated college, I had no money, no job and NO furniture! So whats a girl to do? RAID her parents house;) That's when I found this old gem... well soon-to-be gem. She was still gold and still quite flashy. Not a problem for this gal though! 10 minutes later she was on my parents kitchen floor and painted black. Perfect! New mirror?? Check!

After many years of this mirror being used in its fabulous black paint color, I thought it was time for a change. See... back in the day I had this theory that you could fix any piece of old furniture with some black paint. So, naturally I pretty much painted everything black. Well... after a while, I ended up with a bunch of black furniture. With our new house, I wanted to brighten things up a bit. I went through many different color options for the new mirror. They varied from coral, to sea foam blue, to mint green and so on. Well folks, I ended up not choosing ANY of those colors and went with white. Boring?? I sure don't think so! It was such a drastic change and really lightened up the space. What do you think?


 photo before_zps4da6fc32.jpg


 photo mirror_after_zpsf2025bd5.jpg


 photo mirror_after3_zps3c6020bb.jpg


 photo mirror_after2_zpsbaea8dc9.jpg


 photo mirror_after4_zps85a50015.jpg


 photo mirror_after5_zps5e6f0095.jpg


Friday, January 25, 2013

Bedside Drawers Makeover

Since we have moved into our new home, I have been working on a few furniture makeovers to fit our space just perfectly! My first makeover in the new house is a piece of furniture that I have had my whole life and is actually older than me!

It has been painted many different colors over the years, and my mom even told me that it used to be a pale yellow and sat in my room when I was a baby! I then brought it along to college with me, painted it black and switched out the knobs. For the past few years it has sat in our guest bedroom in the semi-gloss black that you see below. For the new house, I wanted to switch it up a bit and give it a little makeover. I was going for something lighter and brighter to keep the room neutral - rather than the semi-gloss black paint I had used previously, I went with a grey matte color and sanded the black through. I'm so happy with the final product! I feel like the new color makes the glass knobs just sparkle! What do you all think?


 photo before_after_zps02826354.jpg


 photo drawers_zps2dd1ca3c.jpg


 photo drawers3_zps965d84e1.jpg


 photo drawers4_zpsd31c5848.jpg


 photo drawers6_zps4de2f8fd.jpg


 photo drawers5_zpse09e4049.jpg


 photo drawers2_zpsdcc830cf.jpg


Hope you all enjoyed! If y'all are wondering where to find the knobs, you can find a few different options at places like Lowes and Home Depot. I think they range anywhere from $3-5 per knob. Not too bad, right??


Wednesday, October 24, 2012

DIY Upholstered Chair

After lusting over a few beautiful designer linen chairs {found HERE}, I actually found a hidden gem on Craigslist that had some big potential. Given the plaid was about 20 years behind the times, and there was NO cushion... AND I had to convince my hubby to drive with me about 45 minutes to go pick it up....I had to look past all of that because I was able to grab this sucker for only $40!! Such a steal!


Unfortunately, I later found out that getting a cushion professionally made would have been over $100, so I was stuck with a big desicion. Either rack out the dough, or make it myself. Well, I decided to go with the second option. I got so excited when I found this good deal, so I couldnt bare to let myself spend $100 on JUST the cushion! That would have defeated the entire point of buying the chair in the first place! After googling a few tutorials on how to make a cushion, I had convinced myself that I could do it. I was going to commit to the cushion and never look back!

A trip or 2 later to Joanns, I found a great deal on foam. I got a little under 1 yard of 5 inch foam at HALF OFF! The whole piece only cost me $30 when it would have normally been $70/yrd. I also got my fabric half off with my handy dandy Joanns App on my iphone:) And  guess what - The cording I used was actually CLOTHESLINE! Instead of paying $4/yrd {like you would normally pay for trim or cording}, I paid $4 for 100 feet! I used this for the cording on the cushion as well as doubling it up to act as trim around the entire chair. The entire project ended up costing less than $100 including materials and the cost of the chair. Perfect!


And here is the { After }


(Scroll down for more pictures)

Now after finishing this project one might ask themselves - would I do this again? Well... I'll just say this. I would not wish to EVER do this again!! Reupholstering a piece of furniture is one thing, but putting in the time and effort to make the cushion as well? It was just exhausting. I hope to never have to do a big project like this any time soon, but hey, the outcome was totally worth it:)

I'm also not going to claim that my cushion looks perfect. Because it doesn't. And I'm not going to try and give you my tutorial on the cushion because there are some great blogs that will teach you much more than I can:) But what I will do is share the tutorials that I read and hope it helps you in your cushion making experience:) I will also give you my step by step guide to upholstering - because THAT I know how to do! 

Below are a few links that guided me along my {Cushion Making} Journey:

Little Miss Penny Wenny
Little Green Notebook
Design Sponge


And here is my basic Step by Step tutorial on upholstering a chair:

1. Start by ripping off the cording with some needle nose pliers. If you wish, you might want to keep the cording to measure out how much new trim you will need.
2. Next, carefully take off the fabric (also using needle nose pliers). Make sure to keep the fabric pieces because you will use them as a pattern to cut out your new fabric.
3. Either re-stain the wood on your chair, or sand and paint it like I did. I used multiple colors to give the chair an antiqued look.
4. Lay out your new fabric and place the old fabric pieces on top of your fabric to act as a pattern. Give yourself 1-2 inches of extra fabric around your pattern so you have room for mistakes. (you will eventually cut off the excess fabric)
5. Begin stapling the new fabric pieces in place where they now belong. I used a cheapo hand stapler, so my hands were hurting pretty bad towards the end of this step. Just a warning! :)
6. Once you are done stapling in your new fabric pieces, it's now time to trim the excess fabric and start hot gluing your trim. Make sure to have wide enough trim to hide your staples. I had to double up my cording in order to cover all my staples, but If your using normal decorative trim, you shouldn't have to do this.
7. Step back and enjoy! If you have a piece that requires reupholstering a cushion as well, visit the tutorial links above:)


And of course my sweet little Bailey helped me the whole way through! And when I say "helped" I mean pounced, chewed, and napped on the fabric and cording:) She kept me entertained to say the least!


Thursday, October 11, 2012

Designer Brands vs. The Blissful Bee Bargains! Who will win??

Over the past few months I have been putting my formal living room through an intense step-by-step makeover. It's been one of those things where I thought it was going to be an easy "move some furniture around" gig, but it evolved into much  much more than just that! I realized I would never truly be satisfied with the room if I was just re-arranging, because when it came down to it, I just wasn't happy with a lot of the furniture. And I'm pretty sure if you don't like the furniture, you're NOT going to like the room! That's when I knew there needed to be some big changes - I wanted the designer look, but on a "Blissful Bee" budget;) And here is how I did it...

This post will show you a few comparables I have found that are similar to the pieces that are in our living room. I have listed the designer for each comp, and their prices - their STEEP prices might I add. Then I have listed my version and where I found it. Enjoy!


_______________________________________________________________

:: FYI ::
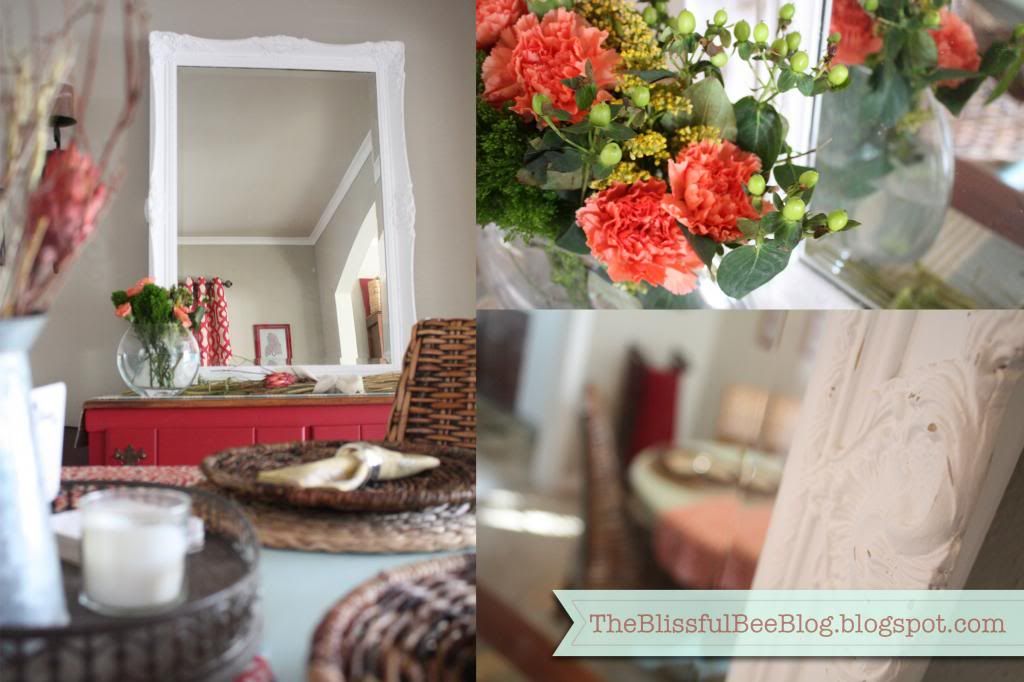
The settee of mine is an antique that I refinished and re-upholstered and you can
find that post {HERE},but the coffee table and chairs are newly bought:) 

Who do YOU think wins the
{designer} vs. {blissful bee bargains} battle??
_______________________________________________________________

Natural Linen Settee - Wisteria, $1,399


_______________________________________________________________


Sofia Settee - Ballard Designs, $1,249

Sofia Settee


_______________________________________________________________


Talina Settee - Horchow, $3,899
 
_______________________________________________________________

The Blissful Bee Version!

Antique Cane Back Settee - Antique Store, $100


_______________________________________________________________ 

Edda Coffee Table - Horchow, $1,799


_______________________________________________________________

Uttermost Stratford - Carolina Rustica, $932


_______________________________________________________________

Currey & Co. - Layla Grace, $872
Currey & Company Ludlow Coffee Table 
_______________________________________________________________

The Blissful Bee Version! 
Stein World Bridgeport Coffee Table - Hayneedle.com, $220
I found this table not only on sale for $234 (originally $281), but ALSO $2.99 shipping, NO TAX, and 10% off my entire purchase!!! You can't even find that good of a deal at Home Goods! My total came out to be only $220. Man, I'm am a happy girl:) And let's be honest, even if it wasn't on sale, even if I did have to pay tax, and even if I did have to pay for shipping - it would have been a GREAT deal.

A. MA. ZING.
Stein World Bridgeport Round Coffee Table

_______________________________________________________________

Gramercy Chair - Ballard Designs, $319-$547 (ea.)
_______________________________________________________________

Amanda Linen Chair - Horchow, $572 (ea.)
_______________________________________________________________

The Blissful Bee Version! 
Beige Linen Swoop Chair - Home Goods, $199 (ea.)


_______________________________________________________________   

Linen European Chair - Wisteria, $800


_______________________________________________________________   


Marseilles Chair - Restoration Hardware, $790

Marseilles Chair


_______________________________________________________________   


The Blissful Bee Version! 
Antique Chair - Craigslist, $40


I found this on craigslist for only $40 and reupholstered it myself! With the cost of fabric and everything, it probably ended up costing about $80:)

Hope you all enjoyed my comparisons!! Who do you think wins???


Sunday, August 12, 2012

{Antique} Settee Makeover

Hey guys - Well today I'm back with another ::Before & After:: post for y'all! This is really one of my favorites, so I sure hope you enjoy:)


A few months ago I found a beautiful settee at a local antique store and just had to have it! For a while now, I had been looking for a small settee for the end of our bed in our master bedroom. I knew this would work perfectly and at only $100, it was too hard to pass up. The cushion needed to be replaced {or removed} and I also had some plans to paint the piece as well. Here it is sitting in the antique store before I bought it.


I ended up not using the settee in our master bedroom like I had originally planned. It sat in there for a while, but I eventually found a new home for it. I have recently been working on making over our formal living room {this post will be coming soon} and needed more furniture for the space. As much as I loved the settee in our bedroom, I knew it would fit better in the formal living area. Below is the process of what I went through when making over the settee.


Here are a few of my ::inspirations:: for the piece:


Here is my ::before & after:: for the piece:

 { Before }

 
 { Process }


 { After }


So what do you think?? I am still considering adding a new cushion, but that will come in time. I have brainstormed a few ideas on how I could do it myself, but we shall see... I'm also very excited to show y'all our formal living room makeover as well! More of that to come:) Hope everyone had a wonderful weekend.