

As Pinterest has grown in users, the company has grown as well. There are so many ways to get your business or blog known simply by using Pinterest. For example, when I first started The Blissful Bee last April, I have to thank Pinterest for getting my name out there. When I blogged about my DIY factory cart table, people pinned that project over 3,000 times! My DIY drum light fixture has been pinned over 5,000 times! It's pretty crazy to think about, but very exiting as well. Over the two years I have been on Pinterest, I have somehow gained 2,600 followers! I do have to admit that I might be on Pinterest a little too much at times, but I really do believe it has helped my blog grow.
Today I want to share a few of my favorite tips for using Pinterest. My first tip is to ALWAYS include a "Pin it" button somewhere in your post. Whether it's a button that is placed above the image, at the top of the post, or hovering over the image, they will all work wonders. Simply by having that button somewhere on the post will remind your viewers to pin your project. Including a "follow me" button in your sidebar is another great way to remind your readers to follow you. As you can see, I designed a custom button that matches my blog, but Pinterest offers a "follow me" button as well (as seen in the widget builder below).
I also include a watermark of my website URL on each image I post. That way when it's pinned on Pinterest, people will hopefully start to recognize your blog name even if they don't repin your stuff.
I also include a watermark of my website URL on each image I post. That way when it's pinned on Pinterest, people will hopefully start to recognize your blog name even if they don't repin your stuff.
As you can see, Pinterest has given us an easy to use Widget Builder (pictured below). It gives you a few different options to choose from, but a really fun option is the Board Widget and Profile Widget. You can also add your "pin it" button and "follow" button here as well. The hover button is a little more difficult to add because you have to add additional HTML coding. This cannot be done through the Pinterest website, but you can see a tutorial on adding the hover button [here].
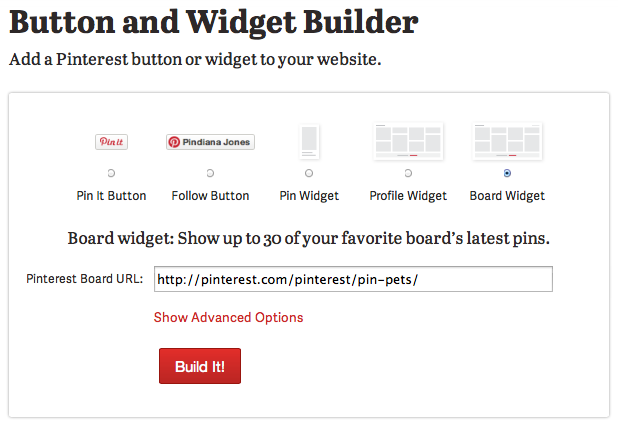
To build your own Widget Builder, click [here].
Another helpful tip is to include your blog name on your account. For example, my Pinterest name is Amy@TheBlissfulBee. Instead of using my first and last name, my first name is Amy, and my last name is "@TheBlissfulBee". This is also a great way to get your name out there. To make this change, go to your profile, and click on the pencil icon at the bottom right corner. There, you can change your user name and also write a short description of yourself. I have also included my blog website in this description.
Here are a few of my favorite boards on my Pinterest account. If you like what you see, make sure to follow me!
I also try to pin my project after I have published my post. For a while, I felt silly pinning my own projects, but I feel like it really does lead new readers to my blog. I don't do it with every post, but I will on some of my more important ones. If I feel like it's something a reader will really enjoy or learn from, I will pin it. I hope that some of my words of wisdom will help you all in your Pinterest journey! Let me know if you have any further questions and I will try to help answer them:)

Who I'm linking up with:


